Introduction
Replacing a microwave door switch is a common repair when a microwave refuses to start or stops unexpectedly during use. Because the switch is a small component, the replacement process is usually straightforward.
Why Replacement May Be Necessary
Door switches wear out over time due to repeated use. Each time the microwave door opens and closes, the latch presses against the switches inside the appliance.
Eventually the internal contacts inside the switch can wear out or become damaged.
If the switch fails, the microwave may behave as if the door is still open.
If you have not yet tested the switch, start with this guide:
How to Test a Microwave Door Switch
Tools Needed
Most door switch replacements require only basic tools:
• Screwdriver
• Replacement door switch
• Basic hand tools
Always disconnect the microwave from power before starting the repair.
Step-by-Step Replacement
Step 1 — Disconnect Power
Unplug the microwave before opening the appliance.
Step 2 — Remove the Outer Cover
Remove the screws on the back of the microwave and slide off the cover.
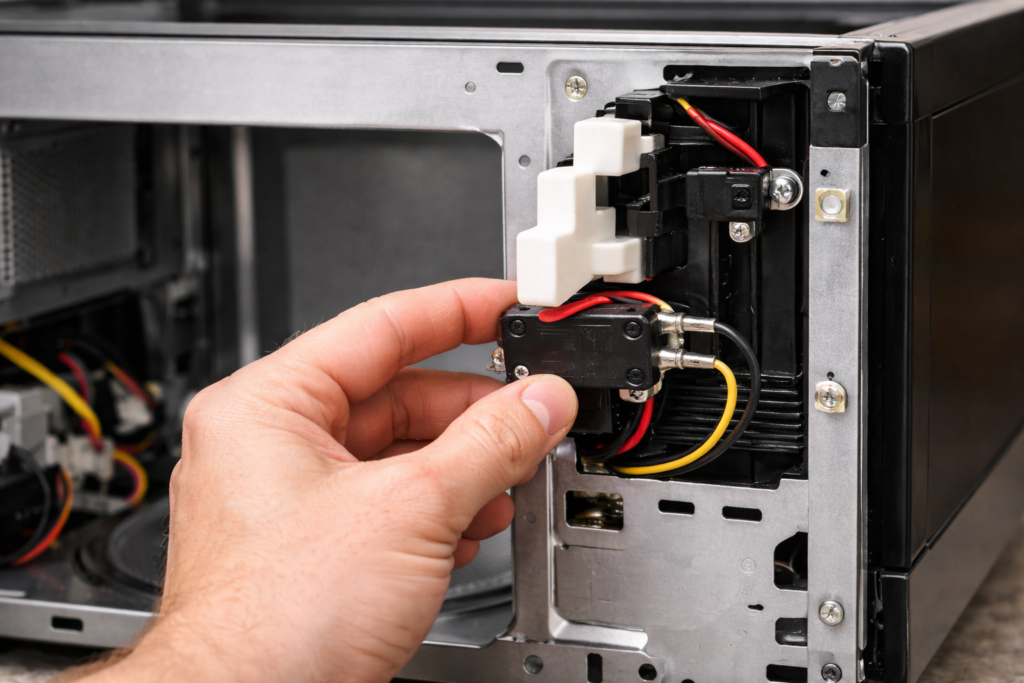
Step 3 — Locate the Switch Assembly
The switches are normally located near the door latch inside the front panel.
Step 4 — Remove the Faulty Switch
Disconnect the wires and remove the switch from the bracket.
Step 5 — Install the Replacement Switch
Insert the new switch and reconnect the wiring.
Step 6 — Reassemble the Microwave
Replace the outer cover and restore power.
Related Guides
Signs a Microwave Door Switch Is Bad